Aesthetics - 7 Easy Ways to Improve the Look of your Garden
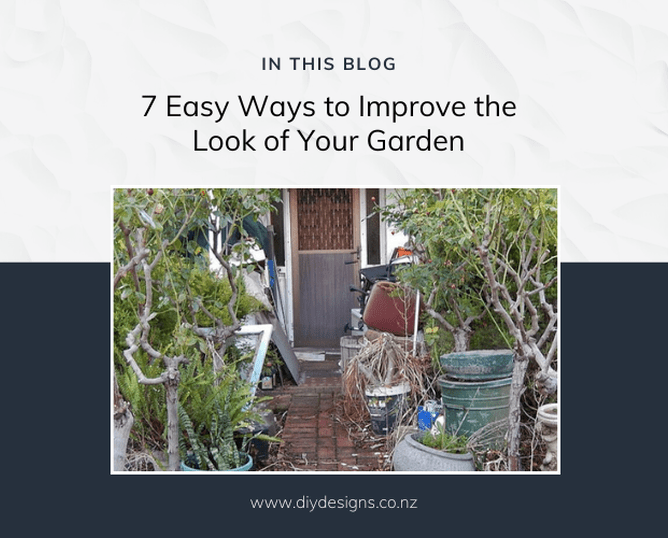
DAY 15 : Less is more – De-clutter your garden
Recent garden trends have seen a move toward simple, uncluttered garden spaces. A bit like de-cluttering your house, removing excess items to pare things back is a great way to start on improving the aesthetics of your garden. This can also be a budget friendly way to help your garden feel more fashionable and up-to-date.
3 Common ‘clutter creating’ landscaping mistakes are:
Keeping dilapidated fences and structures. If you don’t want to invest in a new fence or shed, question if one still even required? Unless you need a fence for security, kids or the dog, it could be that your planting has now matured enough to provide the buffer you need. And if the shed taking up prime real estate in your back yard is full of things you never use (or can’t find), then how about removing it or, if budget permits, replacing it with a smaller, slim-line, cupboard-style shed in your under-utilised side yard.
Little pots scattered every-where. Anything with a diameter less than 600mm (unless it’s taller than 900mm) is not big enough to truly work as a feature pot. Instead, bring your small pots together in one group for greater impact. Pots groups are currently very ‘in’ in the gardening world. This trick works especially well if they are all a similar colour, but eclectic groups work well too. Position them for contrasts in height and plant texture for best results.
Becoming ‘shop blind’. In this age of mindfulness, it’s interesting that this awareness often doesn’t extend to our gardens. Over the past 3 years we have watched the slow deterioration of a front garden across the road from our home, despite the new neighbours ongoing attempts at garden improvement.
What lets them down? Mainly, it’s the small piles of unwanted or forgotten items accumulating in the driveway that do it. The surplus pots piled in the corner sprouting weeds, the abandoned wheelbarrow and tools and the ever-present fluorescent orange flexi-skip. These little things make your property look unloved and messy if left for long periods of time. Take a step back and look at your space with fresh eyes. Store things away or if surplus, re-home or dispose of them. Don’t leave them to clutter up your space and ruin the appearance of your garden. This brings the street appeal of your property down big time.
Bonus garden de-clutter tips: Our week one blog focused on clearing up your garden from a plant perspective so be sure to read those tips for more garden de-cluttering ideas.
So in short: Look at your garden with fresh eyes and assess and remove items that are surplus or past their use by date. Sometimes its’s what you take away, rather than what you put in, that can have the greatest impact in tidying up your garden.
DAY 16 : Keep it simple- material cohesion and unity
Garden trends tend to be cyclical and with each, a range of associated products and materials hit the market, meaning that over time it is easy for a garden to develop a messy, hodge-podge look.
If you are looking for a more up to date or simplified look for your existing garden or you are creating a new landscape from scratch, regardless of your garden theme, I suggest choosing just a few materials for your core construction palette and sticking with these. Repeat them across the garden in a manner that feels balanced and cohesive, and use additional accent materials that will complement, rather than compete, with the chosen feature materials.
For example:
- If you have a masonry block wall, don’t build any new structures in a contrasting masonry texture such as brick or stone, use smooth concrete instead to contrast and complement
. - If you have a lovely timber deck, balance it with timber feature screens at the far end of the garden so there is a repetition of materials across the site. This doesn’t mean everything has to be timber….add stone in paths and walls for contrast and interest.
- If your garden has lovely brickwork, use the same brick as an accent strip in loose aggregate or smooth concrete paths, rather than using a new material, such as bluestone cobbles. Use steel work to add interest to this scheme such as a black steel obelisk for climbing plants and repeat the same steel for handrails and balustrades.
Timeless favourites such as concrete, brick, natural stone and timbers such as kwila and cedar, will stand the test of time in terms of both aesthetics and durability.
So in short, one of the simplest ways to make your garden more visually appealing is to use a cohesive palette of timeless, durable construction materials across the garden to ensure cohesion and unity.
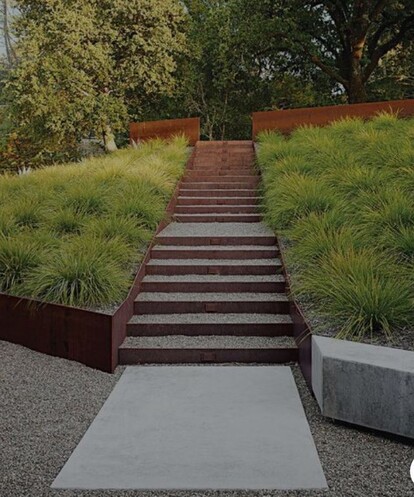
DAY 17 : Get your lawn in shape
Lawns play a key part in most gardens, whether from a functional perspective such as providing play space or as a fresh swathe of open green space that gives your eye a place to rest upon amidst busier areas of planting. Regardless of its purpose, a very common mistake made when laying out a garden is to design the garden beds first and then turn the remaining areas into lawn. Understandably, this usually results in an erratically shaped lawn, often with fiddly bits and tricky corners that make it hard to mow.
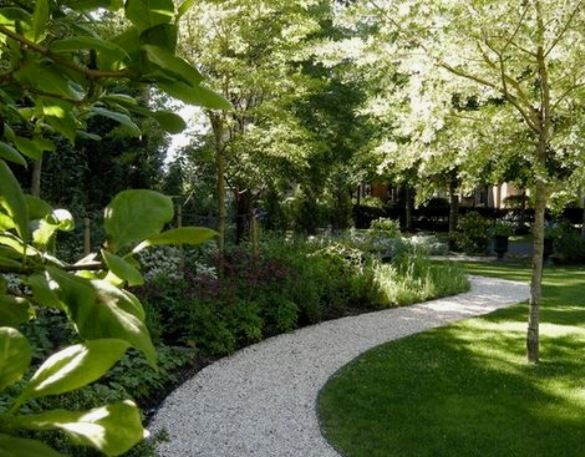
Instead, create your lawn in a bold shape and then, plant the bits that are left over. Instant visual impact and lawn mowing just got a whole lot easier too!
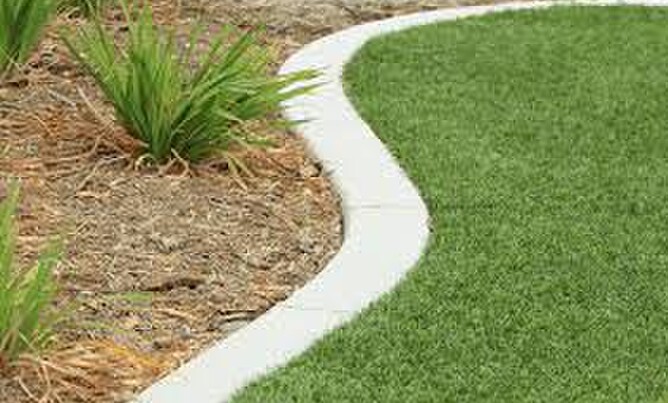
Just decide on a lawn shape that fits your need, space and garden theme. Geometric lawn shapes, such as rectangular, square, round and the old classic the kidney shaped lawn are popular for good reason. Organic curves also work well but are best when they are broad sweeping or gentle serpentine curves, so better suited to larger gardens. Curved garden edges in a small garden often look wiggly and contrived.
But beware, plants travel! They spread and lawn species are no exception. A cut edge is easy and cost effective, but to keep your lawn shape looking crisp and defined over time, a mowing strip or at least a lawn edge, is essential. Choose the most durable option you can afford.
So in short: Lawns pack more punch when they have a defined form, so choose your lawn shape first, add a mowing strip to keep the shape defined and then turn the ‘leftover’ bits into garden. This will provide more visual impact and makes lawn mowing easier by eliminating tricky to mow areas.
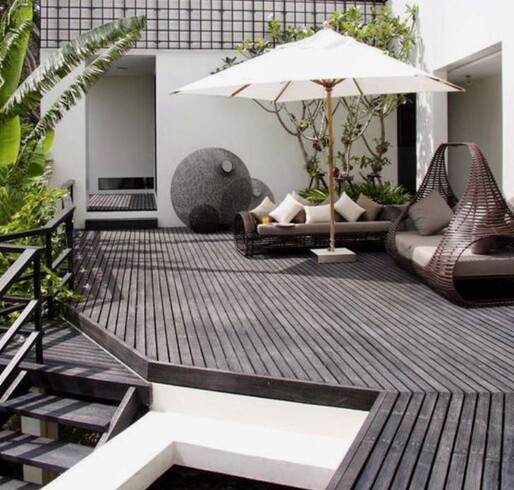
DAY 18: The Ground Plane - Give your surfaces a new lease of life
When designing gardens ‘the ground plane’, which generally comprises a mix of a materials, is given a great deal of thought. These materials provide practical and good-looking surfaces for our decks, patios, courtyards and all those important paths, but overtime these often become tired and neglected. A common mistake is thinking you need to replace these. Just giving them a bit of a zushh up, can do wonders for improving the aesthetics of your garden, and save you money you can use elsewhere in your garden makeover. Here’s 5 ways to work wonders with your existing garden surfaces :
- For timber surfaces, a fresh coat of stain or decking oil will instantly improve aesthetics especially if your deck is newish, not to mention helping condition and protect the wood. If it’s up for repair or replacement, why not be bold and give it a fresh new look to see you through another year or so, using a dark grey or almost black stain or even whitewash effect.
- Before you go to the expense of replacing your worn patio, courtyard or path surface, look at it with fresh eyes. Is the patio surface the problem or is it just wear and tear marring its beauty? Many patios can also be given a new lease of life with a good clean and if it’s really worn, for suitable surfaces a light surface grind or acid wash can really refresh the surface, giving it a new lease of life.
- Adding an outer border with a more up to date or quality material, such as bluestone cobbles around a plain concrete surface, can also improve and update the look of your patio or path.
- Also look at what’s between the paving. Regrouting between tiles or pavers goes a long way as well. If it’s pebbles between, consider adding low growing ground covers such as Dicondra repens, cute NZ native groundcover Leptinella squalida or even artificial turf for a fresh new look. Just be sure to set the planting level low so as not to create debris traps on your pavers!
- Pour on permeable resin products now available mean those attractive but troublesome pebble accents between your pavers can even be bound together, easily and cost-effectively. Good-bye weeds!
So in short, before you replace it in full, consider a revamp or upgrade to tired and neglected ground surfaces instead. This can give new life to your garden and save you big $$$.
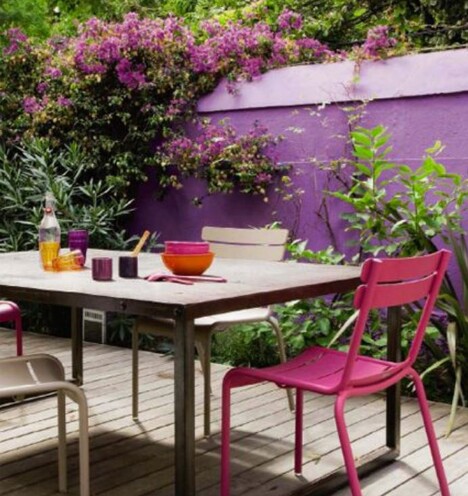
DAY 19: Looking Up - Vertical colour in the garden
Yesterday I touched on ‘ground planes’, today we go vertical. Just like inside your home, walls form an integral part of your outdoor room/s. Outdoor walls encompass fences, screens, hedges and all those other surfaces that make up what garden designers call the ‘vertical plane’.
Dark wall and fences have been popular for a while now and with good reason. They can help less attractive features fade into the shadows, unify a miss-mass of fencing styles and also provide a great back drop for your plants to ‘pop’ against. White is crisp and clean and oh so perfect for traditional and contemporary homes alike.
But if your ‘walls’ are in need of a refresh, or your garden lacks visual interest, why not use this as an opportunity to add a bit of life and individuality to your property. Instead of the usual, old and safe paint colours such as black, white and the very common brown, go for bolder colors such as dark blue, red or dark grey.
If you are feeling brave, inject a bit of wow factor with a vivid splash of un-conventional exterior colour…tomato red or lime green feature walls, purple picket fences, even hot pink, mustard yellow and vivid orange can be used to add an unexpected pop of tones or in your outdoor furnishings or cushions.
If your ‘walls’ are hedges or other vertical plantings consider reflecting plant colours, such as flowers or unusual foliage tones in your hard surfaces or furnishing instead. For a subtle monochromatic effect duck egg blues, grey-greens or lime greens spring to mind.
So in short: Add colour to inject personality and life into the vertical surfaces or ‘walls’ of your garden rooms. Keep it in context with other features in your landscape so that it feels cohesive.
DAY 20: Avoid Boring - Create mystery and intrigue in your garden
Regardless of whether you have a small city garden or a more spacious suburban plot to play with, try to avoid having everything on show at once. A bit like not baring your soul on a first date, a garden should also hold a few things back, in order to surprise and delight. One of my favourite design tricks is a little garden design technique called ‘hide and reveal’.
In essence, you create or place something of beauty or interest and then ‘hide’ it from full view using screens, planting or similar. You need to place a clue to its existence, such as an enticing path that leaves you wondering what’s at the other end. A gap in a hedge or planting that provides a sneak peak of your ‘secret’ or an audible clue such as the sound of trickling water are additional ways to encourage investigation and facilitate the big ‘reveal’ or discovery. Great things to reveal are hidden seating nooks, water features, sculptures and statuary. Just be sure that it is significant enough to provoke a feeling of arrival once reached.
Garden rooms are a well-known design trick to create interest and visual appeal and these, in particular ‘secret gardens’ reached via an archway or gate are a great example of hide and reveal.
So in short : Creating a sense of mystery and intrigue can manufacture garden interest where none naturally exists. Simply use screens and planting to ‘hide’ a garden destination or feature then use enticing paths and sneak peaks to lead to the ‘reveal’ of your garden secret.
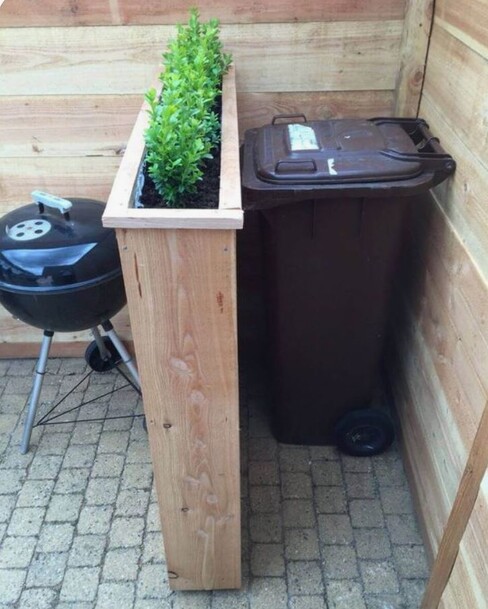
DAY 21 Necessary Evils – hiding those ugly utilities
Every garden has them and they are generally in the most obvious of places, conveniently placed for servicing and use, but bringing down the aesthetics of your garden. Services and utilities!
Some may be happy having their rubbish bins in prime position at the garden entrance but if you don’t fall into this group, relax, with a little thought these can be easily screened while remaining convenient and accessible. The same goes for screening meter boxes, air conditioning fans, gas tanks etc.
This is one of those situations where your design solution comes from the ‘form follows function’ principle. Let’s use those wheelie bins as an example many can relate to.
First, decide what size, shape, height etc your item needs have in order to conceal the offending items. For example, if you look down on them from an upstairs window and approach them from the front only, the ‘function’ of your bin screening is to screen from above while keeping access to the lids clear and provide front screening, so your ‘form’ could be a tall lean-to type structure with open sides. Decorative detailing – such as solid panels, timber slats or laser cut steel panels, comes last and should relate to the level of screening needed, your overall garden theme and other materials on the property.
If you only see the bins from the side as you approach, then a large square pot with a tall plant, or a single screening panel, to around 1200mm high, may be all that is needed to screen your rubbish bins from view.
The same rules apply for concealing those other services, but always bear in mind
- Ventilation - slatted screens and wind tolerant plants offer good, simple solutions , especially around around fans
- Access - leave plenty of space behind screens used to conceal serviced units such meter boxes and gas tanks
So in short: Create screening for unattractive services and utility bins by first determining the required ‘function’ of your structure and then using this to dictate it’s ‘form’ and ornamental qualities.
Coming tomorrow (Day 22 )
As we begin our fourth week in lock-down, we start the '7 days of tips for Adding Value to your Property With Landscaping' section of this 28 day blog.